Terminal Server Patch

Standard

This patch will enable two or more concurrent sessions in Windows XP PRO Service Pack 2 (SP2) and Service Pack 3 (SP3) if you have FAST USER SWITCHING enabled, and your windows is NOT in a domain.

Uninstaller is also included and can be found at windows Control Panel -> Add or Remove Programs.

Windows XP PRO SP2 screenshot
<missing>

Windows XP PRO SP3 screenshot

Image


Download Latest 2.1 Binary

Download Outdated 1.0 Binary

Originally from http://www.kood.org/terminal-server-patch/

Outlook and iTunes 10

Standard

If you are having an issue with outlook opening for a split second and then closing and have recently installed iTunes 10 use the following instructions to fix it:

Resolution

iTunes will sync with Microsoft Outlook 2003, Microsoft Outlook 2007, or Microsoft Outlook 2010. If you use Microsoft Outlook 2000, you can resolve this issue by renaming the “OutlookChangeNotifierAddIn.dll” file. This file can be renamed however you choose, and is found in the following default location depending on your operating system:

* Windows XP, Windows Vista (32-bit) or Windows 7 (32-bit):
C:\Program Files\Common Files\Apple\Mobile Device Support\OutlookChangeNotifierAddIn.dll

* Windows Vista (64-bit) or Windows 7 (64-bit):
C:\Program Files (x86)\Common Files\Apple\Mobile Device Support\OutlookChangeNotifierAddIn.dll

If you install Microsoft Outlook 2003, Microsoft Outlook 2007, or Microsoft Outlook 2010 after renaming this file, you may need to reinstall iTunes 10 before being able to sync Contacts, Calendars, email account information, or Notes.


501R Reset Procedure (Official)

Standard

Image

OPEN 501R ADSL Router

Application Note

Password Recovery

Copyright
Copyright© 2001 OPEN Networks Limited. All rights reserved. The content of this manual is subject to change without notice. The information and messages contained herein are proprietary to OPEN Networks Pty Limited. No part of this manual may be translated, transcribed, reproduced, in any form, or by any means without prior written permission by OPEN Networks Limited.


Introduction

It is possible to restore the 501R to the factory defaults if you have forgotten the administrator password.
This requires physical access to the 501R to use the RS232 console port.

This procedure uses the developer debug interface to the 501R and should be done with caution as experimenting with the other features may irreversibly corrupt the router.
Procedure

1. Connect a RS232 serial cable from your PC to the console port on the 501R.
2. Set your terminal emulator programme to 115 kbit/s, 8 data bits, no parity, 1 stop bit, and no flow control.
3. Reboot the 501R (pull the power plug).
4. Press and hold the A key while the 501R boots up. The following screen will appear:

[I] ADSL Router Information
[S] Software Download (X-Modem)
[E] Erase Current Parameter
[D] Debug Tools
[C] Change Console Baud Rate
[R] Reboot…

5. Press E to erase the configuration and restore to factory defaults. The screen will display:

OlErase success . ..

6.Press Esc then R to reboot
7. Change your terminal emulator programme to 9600 bit/s, 8 data bits, no parity, 1 stop bit, and no flow control.
8.Reprogram the 501R with your configuration. Write to flash and reboot.

Further Help
Further help can be found from:
• Service Provider: please contact your Service Provider.

Warning
Before servicing or disassembling this equipment, always disconnect all power and telephone lines from the wall outlet
Use an appropriate power supply and a UL Listed telephone line cord. Specification of the power supply is clearly stated in Appendix B – Specification of the OPEN 501R User Guide.
The socket outlet must be installed near the equipment and shall be easily accessible.
The socket outlet must be protected by a suitable fuse at the local switch board for short circuit or over current
protection.
This product will not function without mains power.

Determining the name of your computer through Windows

Standard

Windows XP users

  1. Right-click My Computer.
  2. Click Properties.
  3. In the Properties window, click the Computer Name tab. Within this tab you’ll be able to see the full computer name, workgroup and also a description.

Windows 2000 users

  1. Right-click My Computer.
  2. Click Properties.
  3. In the Properties window, click the Network Identification tab. Within this tab you’ll be able to see the full computer name as well as the workgroup you’re using.

Rebooting a Open Networks 501R ADSL router via the telnet interface

Standard

Open command prompt window:

Image

enter (replace XXX.XXX.XXX.XXX with your desired IP address or hostname of the router to control):

telnet XXX.XXX.XXX.XXX

You will be presented with the login screen:

Image

Enter approriate username and password and press enter. You will be repsented with the Main Menu:

Image

Use the cursor key down to go to [REBOOT]

Image

Then the cursor key right. You will be presented with this screen:

Image

Enter Y. then the system will reboot.

After a while you should be able to log in again.

See here for some original Open Networks 501R docs: http://support.blue.net.au/downloads/open501r/

Changing Daylight Savings Settings on SPA941-2

Standard


To set your phone to display the proper time during day light savings:

Press the menu button (under the envelope to the left of the button with a hand printed on it).

Press down on the circular direction pad in the middle of the phone until you get to Time/Date and click the button directly underneath where it says ‘Select’

Go down to ‘Offset(+_H:m:s)’ and change that to 1 if it currently is Day light Savings, or to 0 if it is not.

Click the button underneath Save and exit the options menu.

The time should be shown correctly.

Alternatively you can use shortcuts to get the same effect.

Press:

Menu button (under the envelope)

Number 7

Down twice

Number 1 or 0 depending on whether it’s daylight savings or not

The button under Save

The Button under Cancel.

This will do what I explained above but quicker.

Accessing FTP with FTP over TLS

Standard

Using FTPeS or FTP over Explicit TLS is fairly simple and straightforward. It doesn’t change anything that you do in regards to how you perform FTP actions. The only change is changing your Server Type from regular FTP to FTPeS.

What is FTPeS?
FTPeS is short for FTP over explicit TLS/SSL. TLS and SSL is a means of encrypting data, using a public/private key combination set. This is the same technology that is used to bring secure web browsing (HTTPS) on the web. Note that when you go to purchase an item from a website on the Internet, when you check out most of the time you are taken to a secure website, noted by the HTTPS in the browser’s location bar and by the padlock icon in the bottom status bar of your browser. FTPeS is basically the same thing. FTPeS using the same type of technology to encrypt your login credentials as you log into the FTP server. This prevents anything that might be listening on your connection from reading your username and password. Regular FTP will pass this information across your connection in plain text, so if someone was sniffing your connection, they could easily attain your username and password.

To enable FTPeS for your FTP connection using FileZilla you can follow the instructions given below:

Start FileZilla.

If you are already using FileZilla as your FTP application then you may already have your FTP account stored in FileZilla’s Site Manager.

Click on File and select Site Manager… This will bring up the Site Manager dialog box.

If you are already using FileZilla then you may see your site already listed here. If so, just select it and the information for the account will show up in the right side of the Site Manager dialog box. Otherwise, click on New Site to add your account to FileZilla’s site manager.

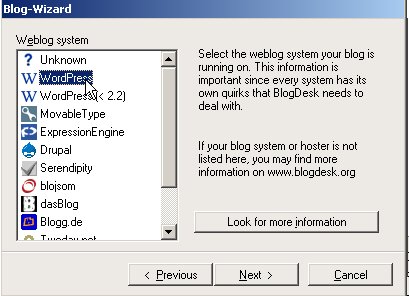
You would fill out the corresponding information accordingly or if you are modifying an account that already existed in the Site Manager, just leave everything as is. The one thing to change is where it says Servertype click the drop down box beside it and notice the options. You will want to select the option for FTPES – FTP over explicit TLS/SSL.

That is really the only change you have to make. Once this is selected and all of your other information is filled in, click on OK or Connect if you want to connect to your FTP account.

Concerning Logontype

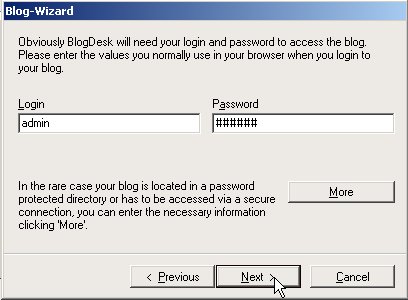
I would highly recommend that you use a Logontype of Ask for password. This does not store your account’s password in the Site Manager. Instead you will have to type in your password every time you connect. The reason for this, is that there have been some viruses and trojans in the past that users have gotten on their computers. These trojans/viruses scan your computer for valid username and passwords and many times it will look in the data storage areas for popular FTP Site Managers. Storing your password here means that you would be vulnerable to attack from this method. If hackers or malicious users gain access to your account’s username and password, then your account can be compromised.

Now when you connect to your FTP account using FTPeS, you may be presented with a dialog box concerning the security certificate being used for the connection. We mostly use self-signed certificates for FTP. Self-signed certificates offer the exact same protection, encryption-wise, that a authoritative-signed certificate does. It is completely safe to accept this certificate.

Near the bottom of the warning dialog you will see an option to always accept this certificate.

If you are going to be connecting to FTP very often, you may want to select this option so that you are not bothered with this warning.

After you have connected you can review the FTP transaction log, near the top of the FTP client. Scroll back up and you can see that TLS was indeed used when passing your username and password information to the server.

Now you can continue to use FTP as you normally would. You can just feel a little bit safer knowing that your login information is not easily viewable by hackers or other malicious users that may be listening to your connection.

Free ftp clients:
http://filezilla-project.org/
http://winscp.net/eng/index.php

Is it possible to have Dovecot imap/pop daemons listening on multiple ports?

Standard

No, not in the current stable release. But there are workarounds, eg using your firewall to redirect incoming traffic to a given port.

# Example IPTABLES, REDIRECT INCOMING CONNECTION ON PORT 9292 TO DEFAULT POP3 PORT

iptables -t nat -A PREROUTING -p tcp -m tcp –dport 9292 -j REDIRECT –to-port 110

Blue Mail server 2: Setup email users and aliases

Standard


Create new email address in your domain


  1. Open browser at: https://mailboxes.blue.net.au:10000 and enter your WEBMIN username and password
  2. Click on “Edit Mail and FTP Users”
    (Note: Even though the link says FTP users this server has no FTP capabilities)
     

  3. Click on “Add user to this server”
  4. Fill in the required details and click the “Create” button:

    • Advise the user of their username and password.
    • This username (= email address) and password can be either used in our webmail interface – http://webmail.blue.net.au – or in your own email program with POP3, SMTP and IMAP (please refer to your instructions for your specific email program to set this up).
    • The incoming mail server is always pop3.blue.net.au and the outgoing mail server is always smtp.blue.net.au. You need to authenticate to our outgoing email server, if you are not using a Blue Net internet connection. See also: General settings for Blue Net services


Setup an email alias in your domain

An email alias is a secondary email address for your mailbox. The mailbox can either be here on our server or it can be any other valid email address.


  1. Once logged in (as described above) go to “Edit Email Aliases”

  2. Click on “Add an alias to this domain”

  3. Fill in the details as required and click on the “Create” button.
    (Note: the other options available here should be self explanatory)

  4. After you performed the action in this example email addressed to example2@example.com will be delivered to example@example.com. The user example@example.com does not need to set up anything.