December 2nd, 2014 admin
Please note that the screenshots below are taken from an iPad device, but the interface of an iPhone should look almost the same. Contact our support team for further assistance.
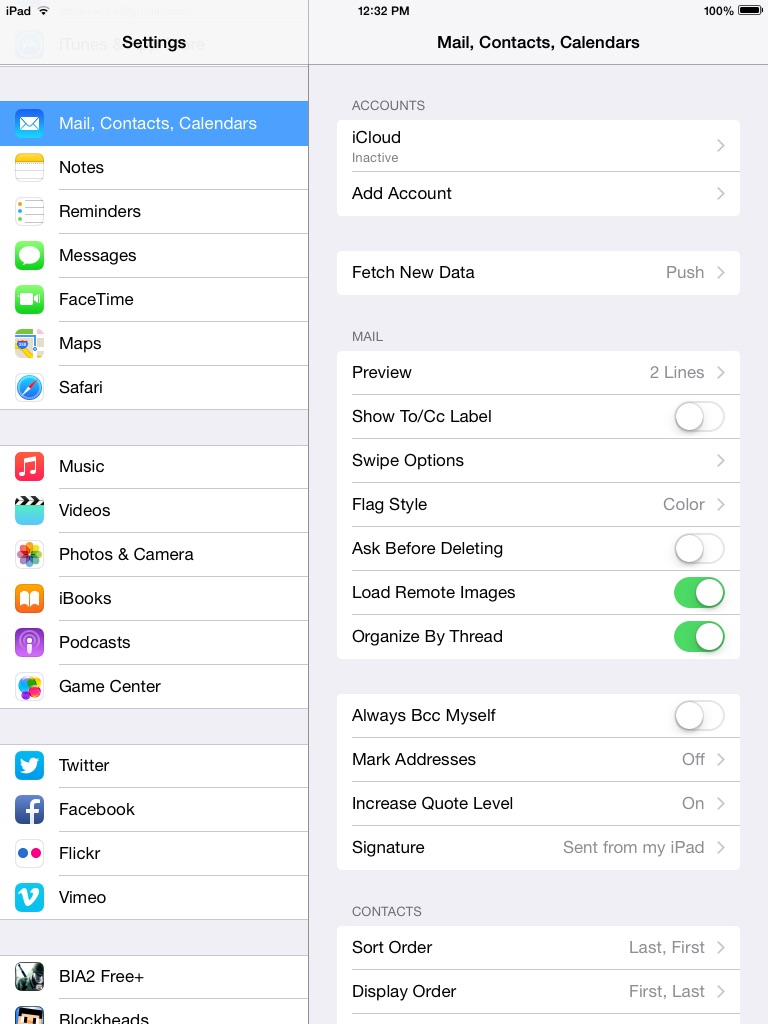
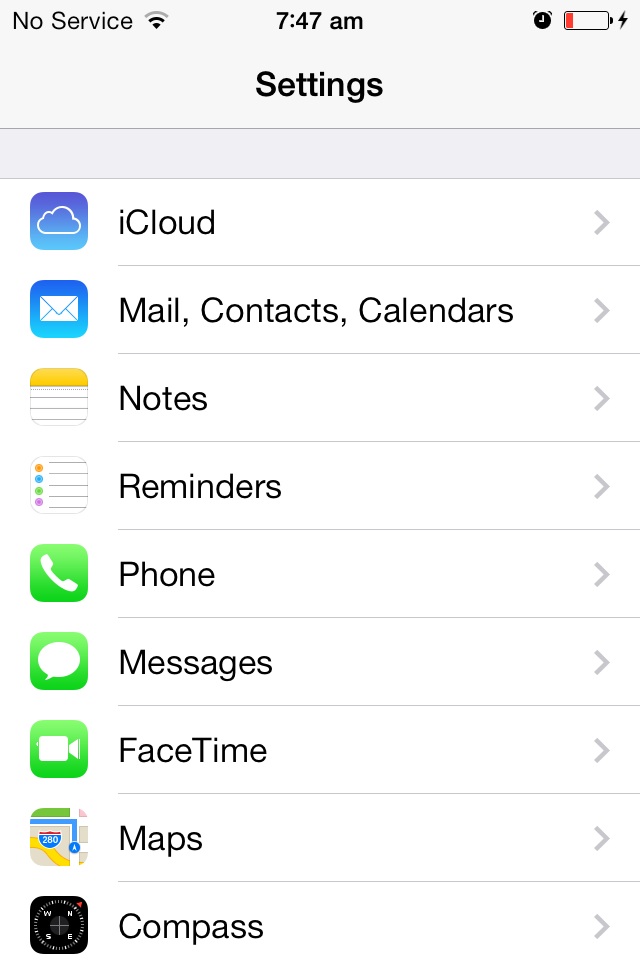
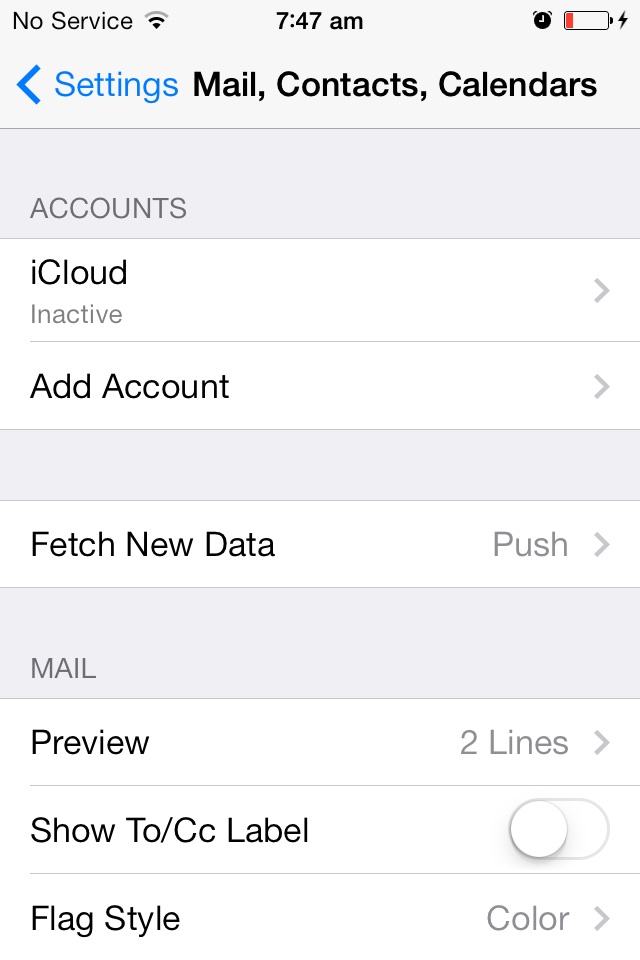
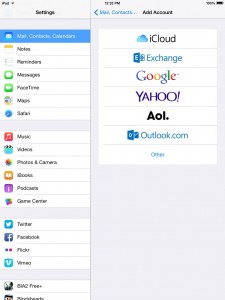
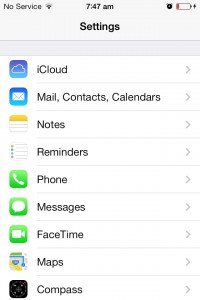
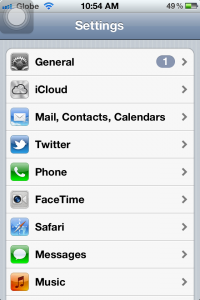
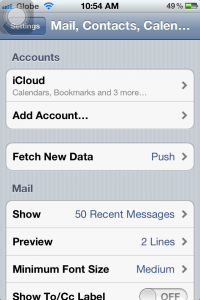
1. On your iOS device, click on Settings, then Mail, Contacts, Calendars, then Add Account.

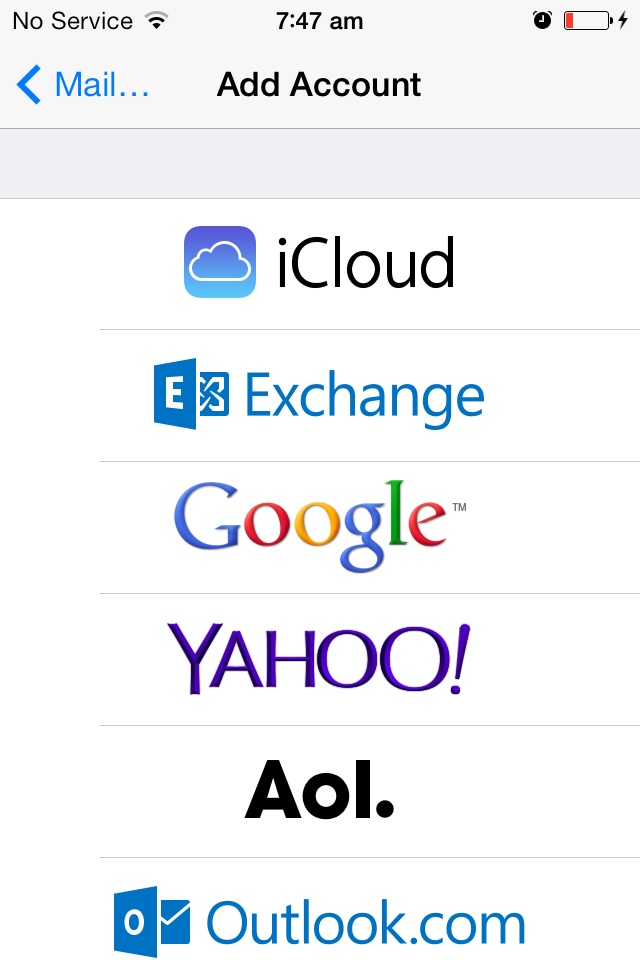
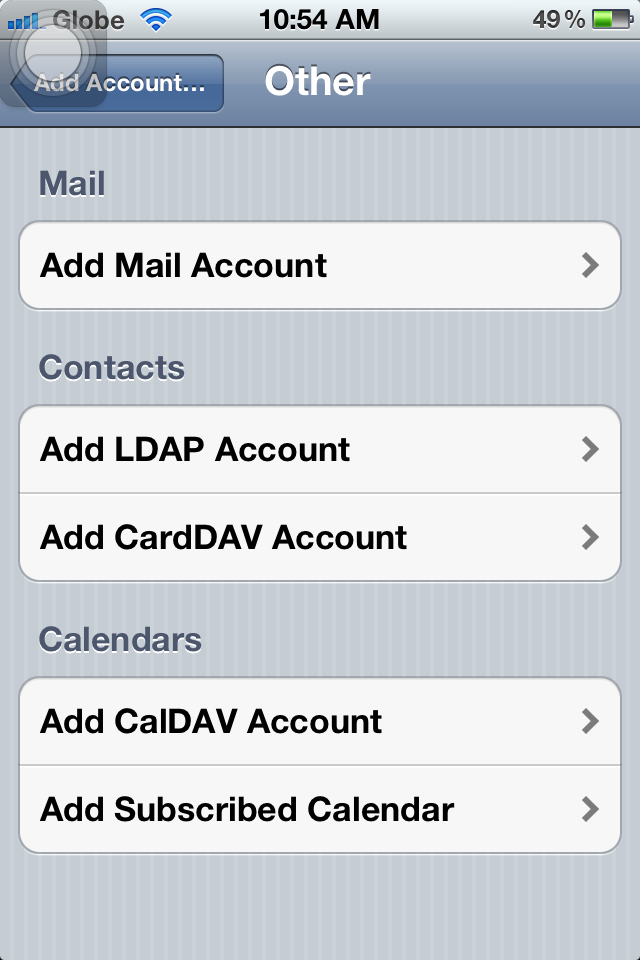
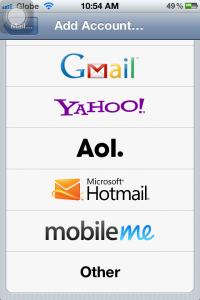
2. Select Other.
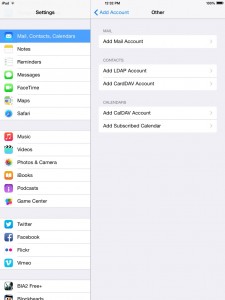
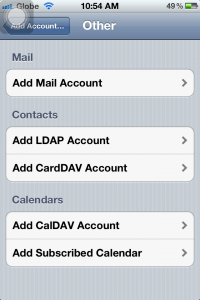
4. Select Add mail account.
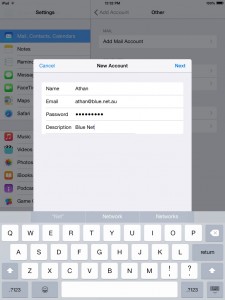
5. Type your email address and password. You can put anything on the Description box. The Next button should be available upon entering the required details. Tap Next when done.
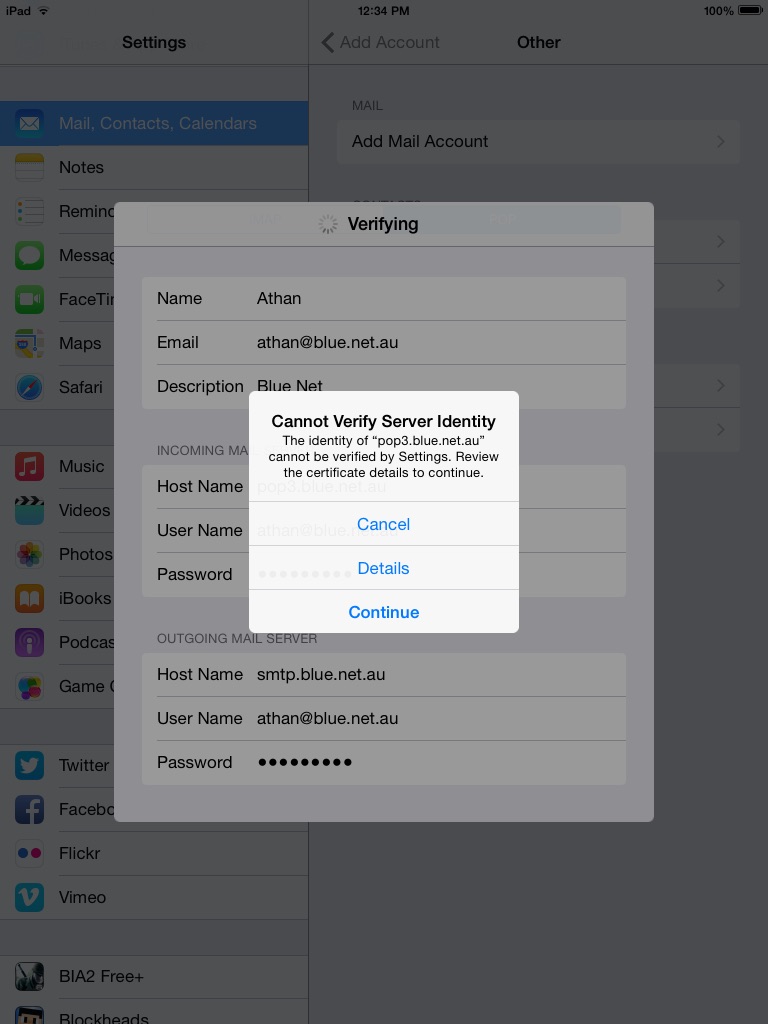
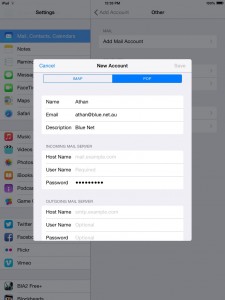
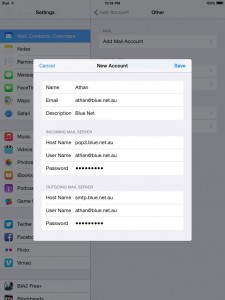
6. You might encounter an error message (mostly for iPhones), just select Continue to move on to the next window, otherwise, select POP then fill in the required details as shown on the screenshots.
7. You will encounter an error message, just select Continue to move on to the next window.
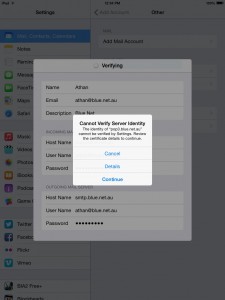
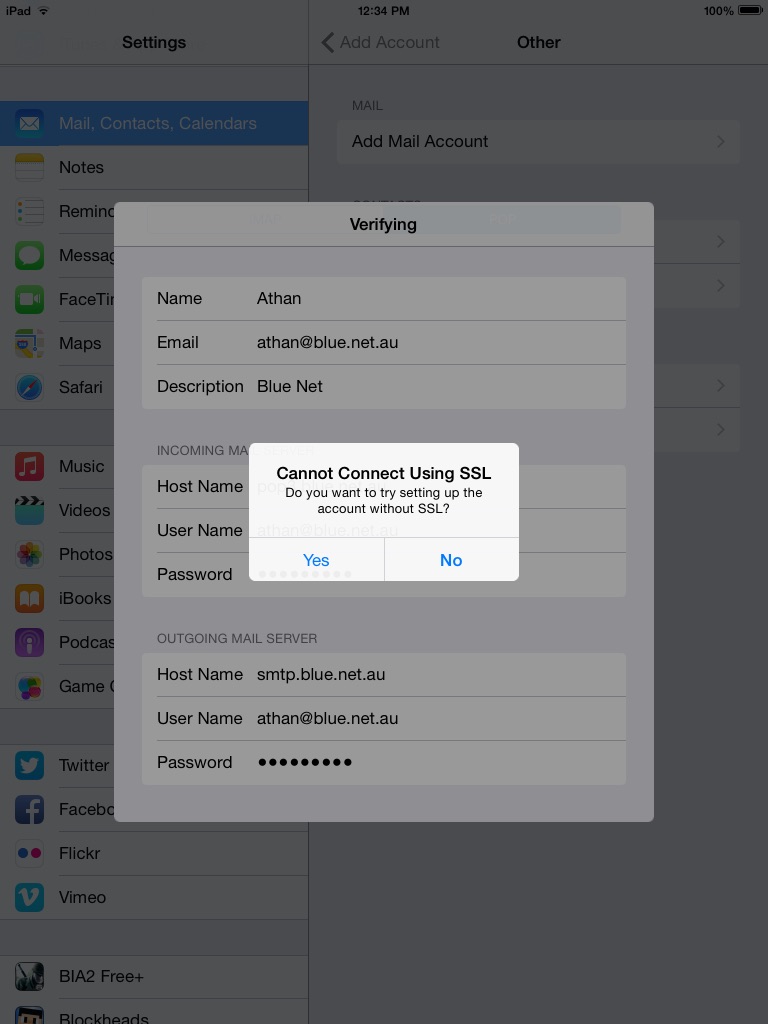
8. You will get this message, Cannot connect using SSL. Choose No.

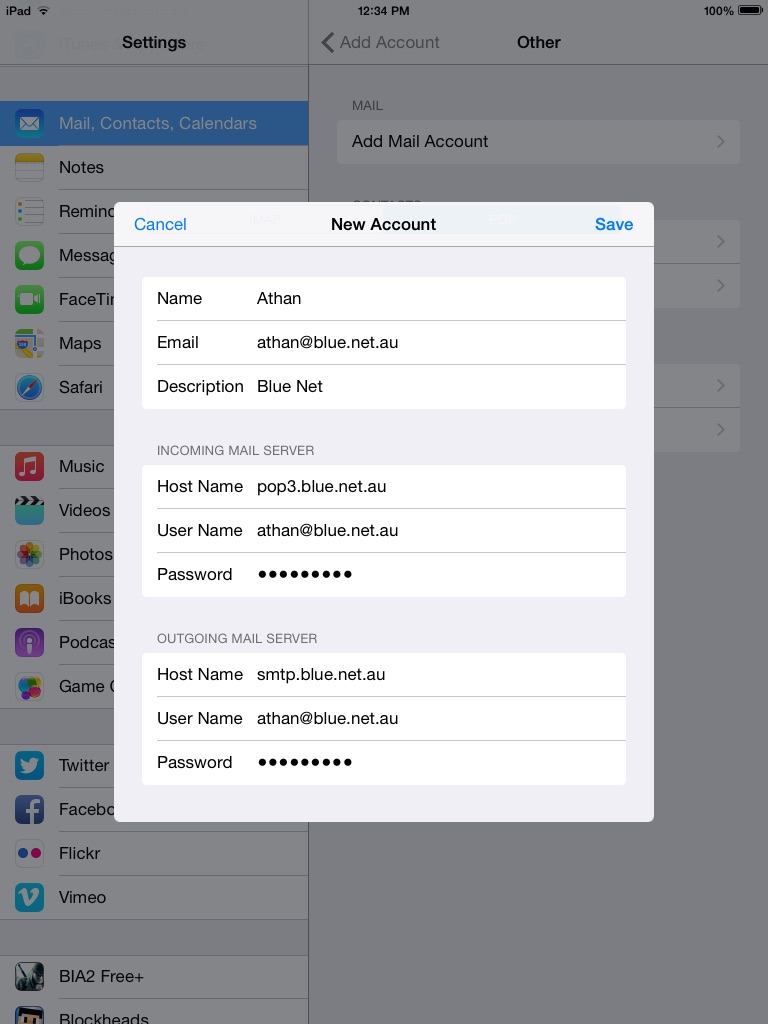
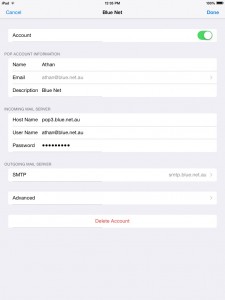
9. You will now have an overview of your account details. Tap Save to continue.
10. Go back to the settings window, then select Advanced.
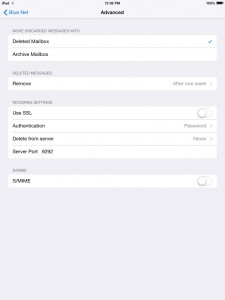
11. Make sure you have the same settings as the screenshot below.
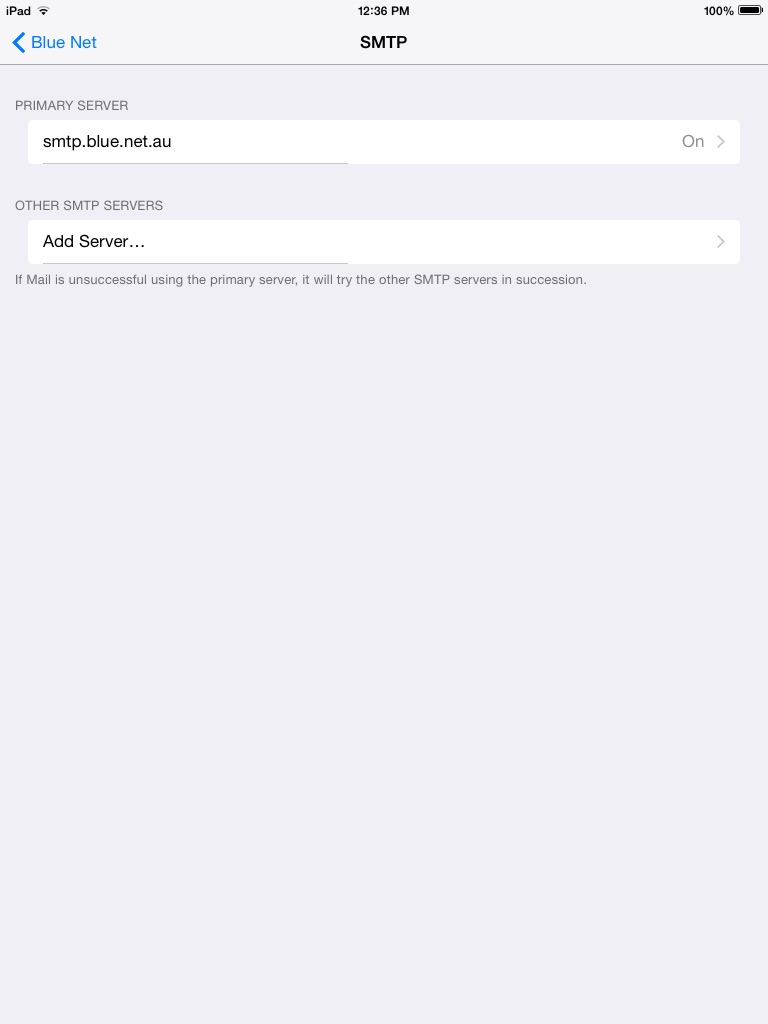
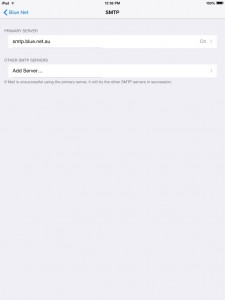
12. Go back to the settings window, then select SMTP, then select your Primary Server.
13. Make sure you have the same settings as below.
14. When you are finished, tap Done and open your email through the Mail App. You might get the same security message (see step 7), just tap Continue, and you should be able to download your messages and send as well.
Posted in Settings | Comments Off on Set up your POP3 account on iPhone or iPad running iOS7 and above
June 3rd, 2014 admin
1. On your IOS device, click on Settings, then Mail, Contacts, Calendars (see below).
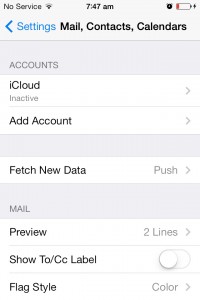
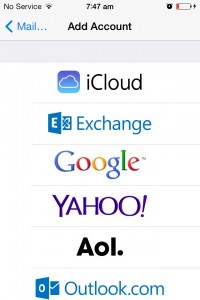
2. Select Add account.
3. Select Exchange.
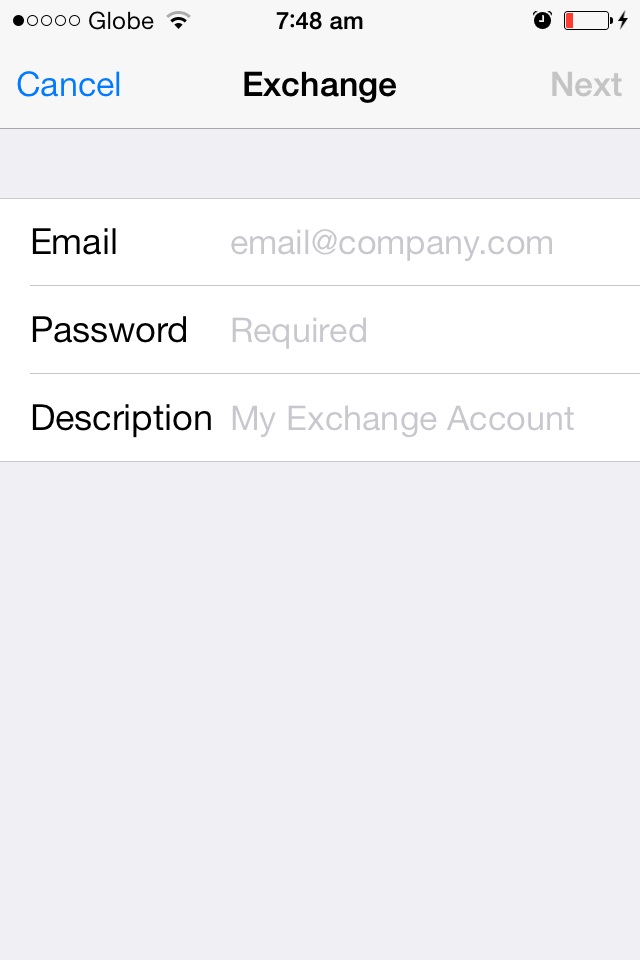
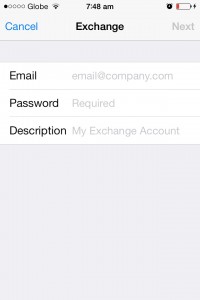
4. Type your email address and password. You can put anything on the Description box (Exchange, work email, etc…). The Next button should be available upon entering the required details. Tap Next when done.
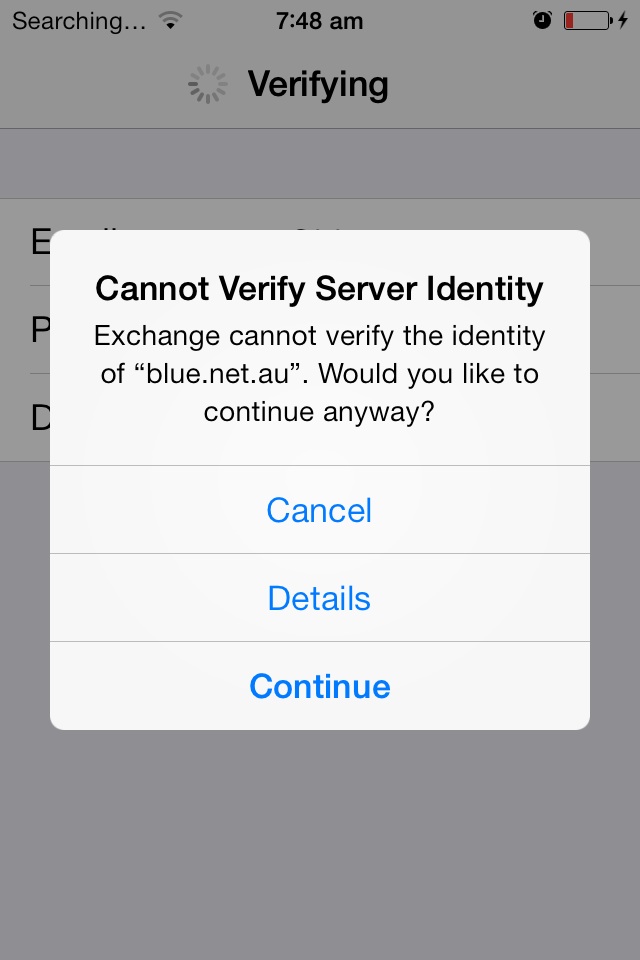
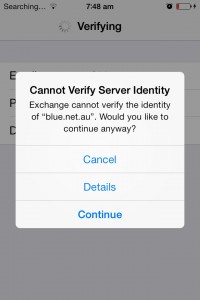
5. You might encounter an error message, just select Continue to move on to the next window.
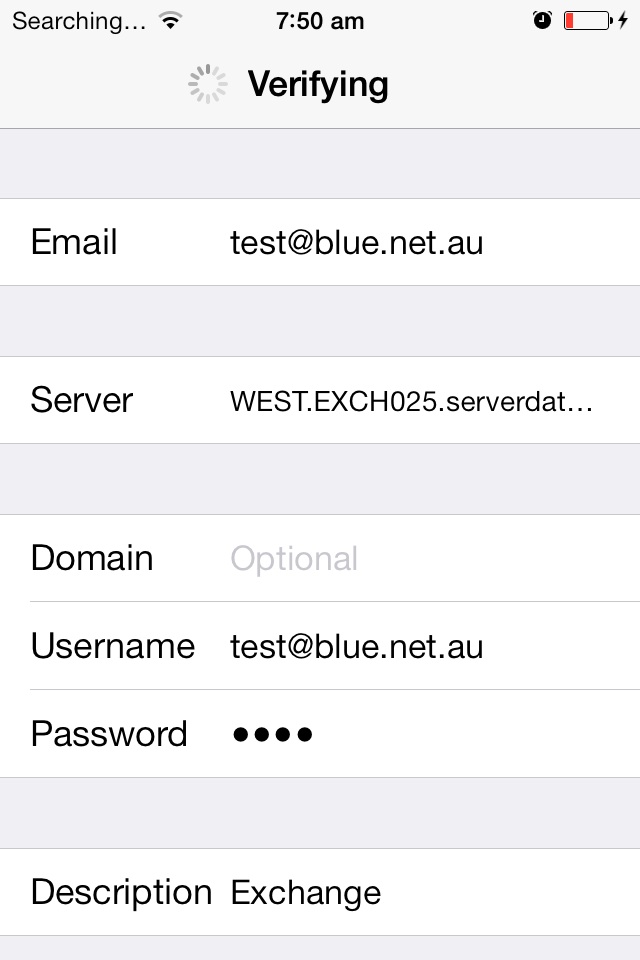
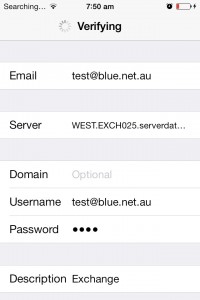
6.Type the required details.
> Replace test@blue.net.au with your own email address.
> Type WEST.EXCH025.serverdata.net on Server.
> Domain is optional. You can leave this blank.
> Type your email address on username, retype password, then tap Next.
Your Exchange email account is now ready. You may close the settings window, then select Mail from the list of your apps.
Posted in Settings | Comments Off on Set up exchange account on Iphone running iOS6 and below
November 6th, 2013 admin
Exchange and Lync, plus other Microsoft products. (Click here for a full list: https://technet.microsoft.com/en-us/security/advisory/2896666)
Microsoft has identified a “zero-day” vulnerability involving .TIFF files. This means that neither Microsoft nor the antivirus companies have been able to develop tools to address this vulnerability. Because this is a zero-day vulnerability, the only way to protect yourself is to exercise extreme caution when opening .TIFF files, no matter how they reach you—whether via Exchange or Lync or through unknown websites. We advise all users to be very careful with .TIFF files. Anti-virus and firewall protection applications may not stop this threat. Do not open any files with a filename ending in .tiff – either through your personal mail or Exchangemail. There are a number of news articles discussing the specific details of the vulnerability. You can read them here: https://news.google.com/news?ncl=d-A1C6SaxJzq77M7R5cmrPtUUtToM&q=zero+day+microsoft&lr=English&hl=en
Here are some answers to questions you may have:
Q: Won’t Blue Net’s Mail Filter catch any viruses that are trying to get through?
A: No. The very definition of zero-day means that as of today, there are no signatures that let us detect any attachments containing malware. Your best defense is user awareness until Microsoft delivers a patch, and until signatures can be developed.
Q: Can I block .TIFF files from being delivered to my end users mailboxes?
A: Unfortunately, that functionality is not available.
Q: When is Microsoft anticipated to deliver a patch?
A: Microsoft has stated that it will “take the appropriate action to help protect our customers. This may include providing a security update through our monthly release process or providing an out-of-cycle security update”. Rest assured that we’ll apply the updates as soon as they’re made available to us.
From Wikipedia:
“A zero-day (or zero-hour or day zero) attack or threat is an attack that exploits a previously unknown vulnerability in a computer application, meaning that the attack occurs on “day zero” of awareness of the vulnerability. This means that the developers have had zero days to address and patch the vulnerability.” The vulnerability is a remote code execution vulnerability that exists in the way affected components handle specially crafted TIFF images. An attacker could exploit this vulnerability by convincing a user to preview or open a specially crafted email message, open a specially crafted file, or browse specially crafted web content. An attacker who successfully exploited the vulnerability could gain the same user rights as the current user. Users whose accounts are configured to have fewer user rights on the system could be less impacted than users who operate with administrative user rights.
Posted in Exchange Hosting, Windows | Comments Off on Microsoft server products affected by TIFF vulnerability
April 15th, 2013 admin
- Open https://controlpanel.msoutlookonline.net/asp/MManager/Login.asp?mmm=1 in your browser making sure “My Services” at the top of the page is selected.
- Login with email address and password
- On the right hand site is a link “Change password:”
- Follow the prompts
Note:
New passwords have to conform to the Password complexity rules:
A password must not contain:
- all or part of the email address;
- the entire Account Name;
- the entire Display Name.
Note: The Account Name and Full Name are parsed for delimiters: commas, periods, dashes or hyphens, underscores, spaces, pound signs, and tabs. If any of these delimiters are found, the Account Name or Full
Name is split and each section is verified as not included in the password. There is no check for any inidividual character or any three characters in succession.
Minimum password length is six (6) characters.
The password must contain characters from three (3) of the following five (5) categories:
- English uppercase letters (A-Z)
- English lowercase letters (a-z)
- Numbers (0-9)
- Special characters (e.g. ! $ # %)
- Unicode characters that do not fall into one of the above categories (e.g., a Japanese character or Russian letter)
Posted in Exchange Hosting | Comments Off on Change Exchange account password
April 12th, 2013 admin
These settings apply in iPhone, iPhone 3/3g, iPhone 4/4s, and iPhone 5. I will be using my Bluenet account for this guide, just change it into your corresponding emails and passwords.
1. Go to Settings, select Mail, Contacts, Calendars.
2. Tap Add Account…
3. Select Other
4. Tap Add Mail Account
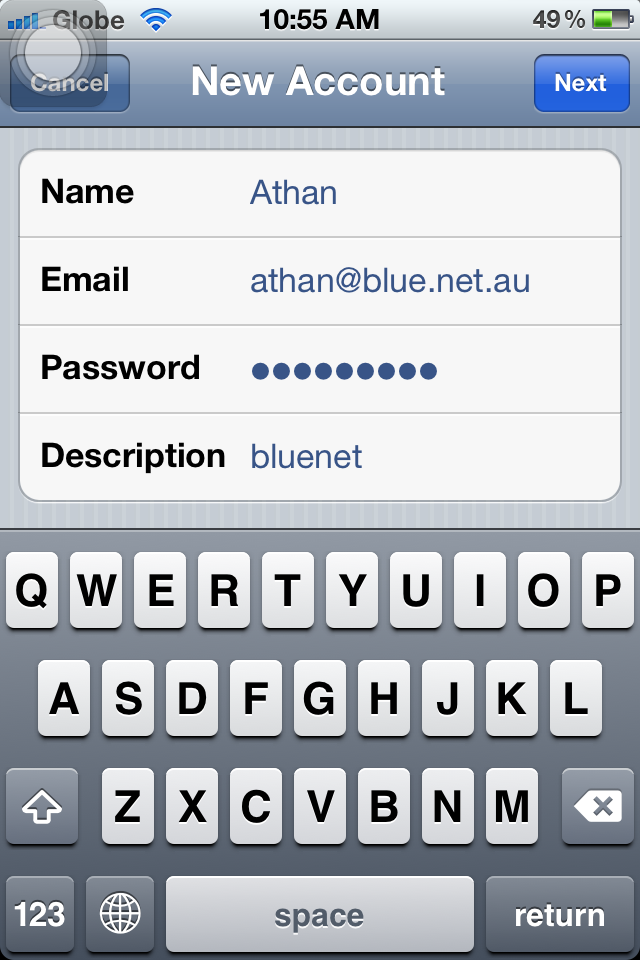
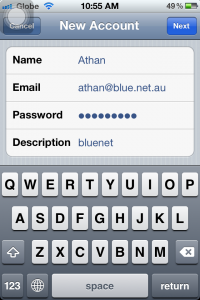
5. On this screen, please fill in your details (Description can be your name, or company name, or anything you’d like to put). Tap Next when you are done.
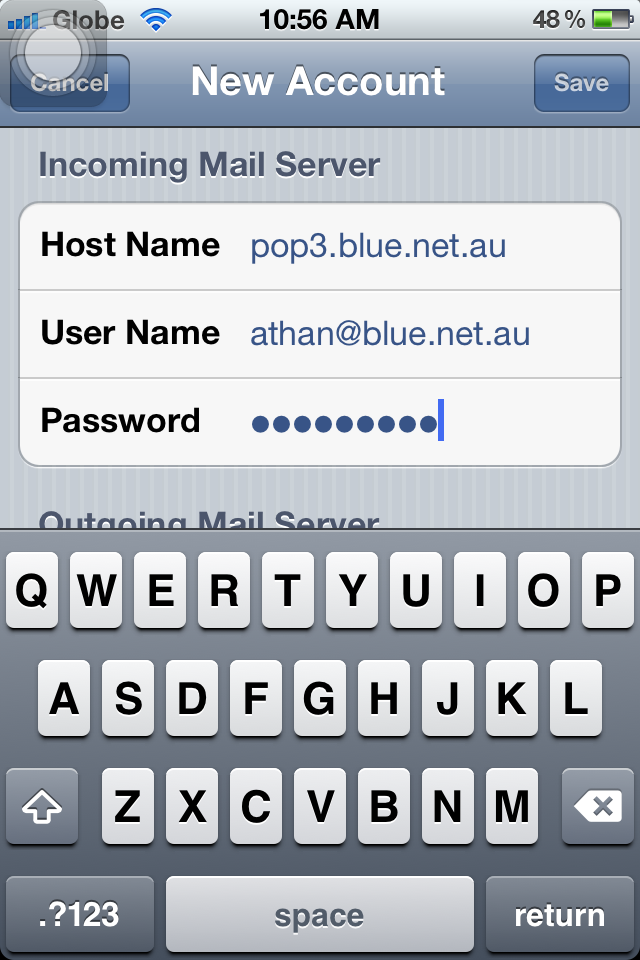
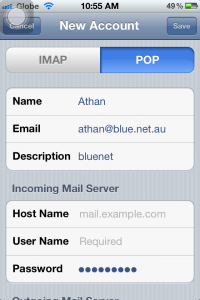
6. Select POP, then proceed with typing the Incoming Mail Server settings.
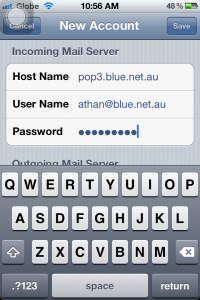
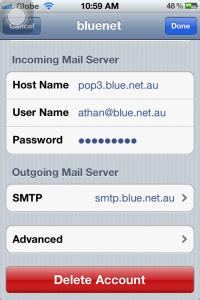
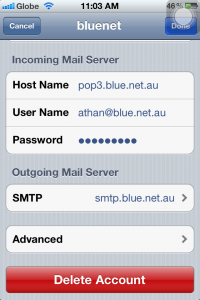
6a. Host name should always be “pop3.blue.net.au” and do not forget to type your username, which is your complete email address, and your password.
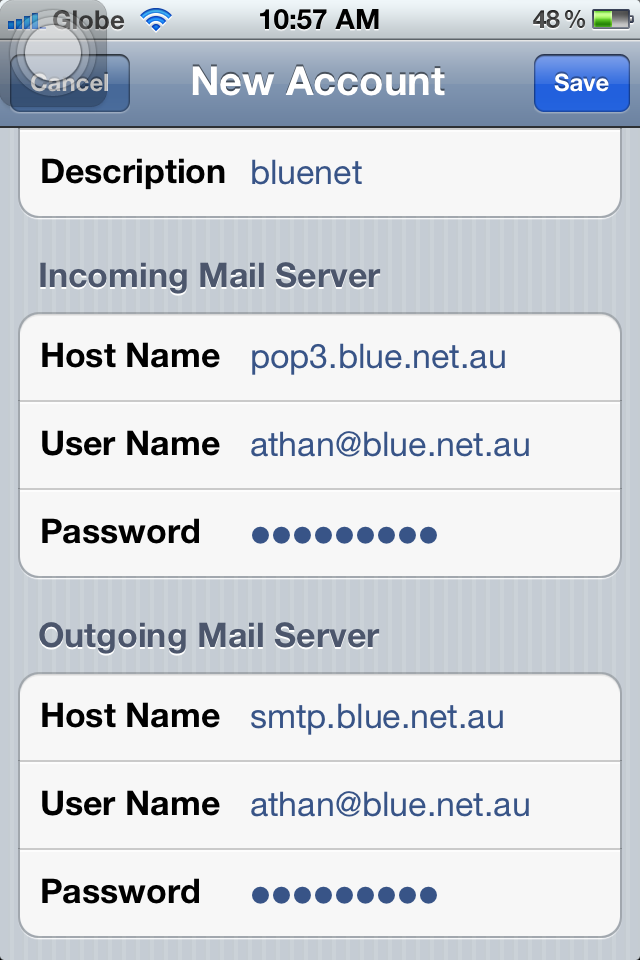
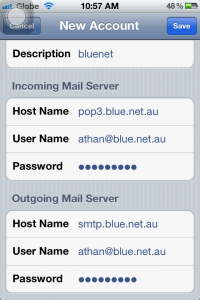
6b. Now for the outgoing, it should be “smtp.blue.net.au”, then proceed with your email and password. Tap Save (upper-right) when you’re done.
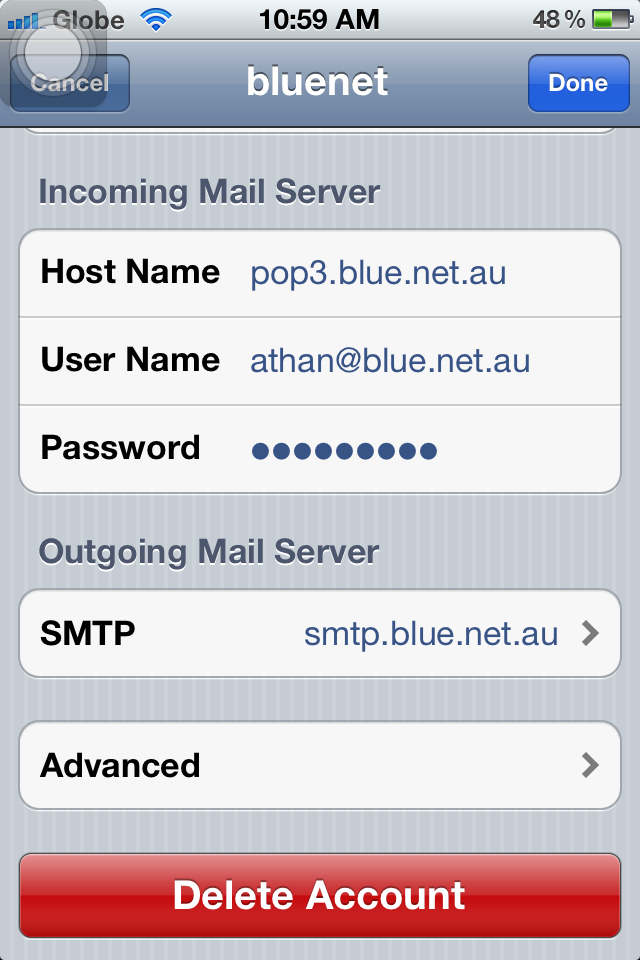
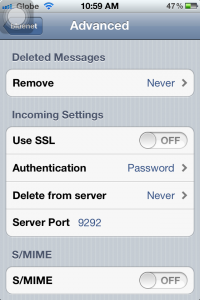
7. Upon saving the settings, it should normally give you an error. You will be back on the “Other” window, simply tap on your email account to change the settings. From there, go to “Advanced”.
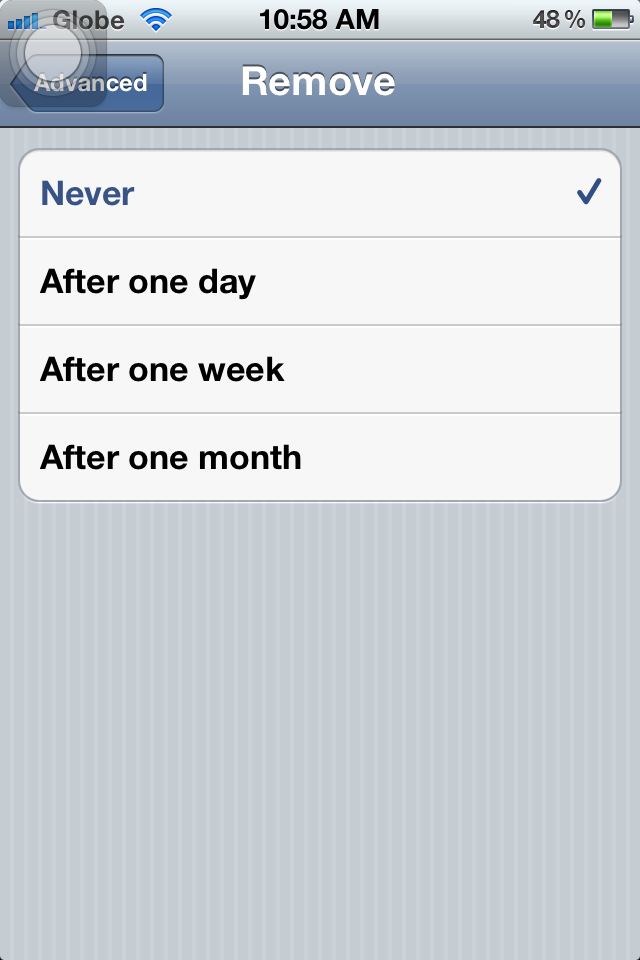
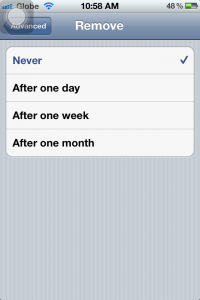
7a. Make sure Deleted Messages are set to “Never” as seen below. You can always delete the messages on your computer in case you need to retrieve important emails that were deleted.
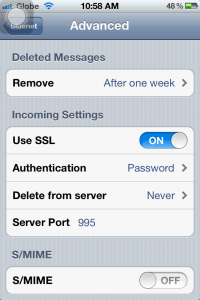
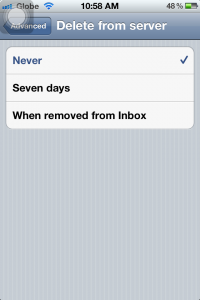
7b. On this window, set the option “Delete from server” to “Never” so you can download the messages also on your computer and other devices. If not, you will only be able to download this on your iPhone but not on other devices.
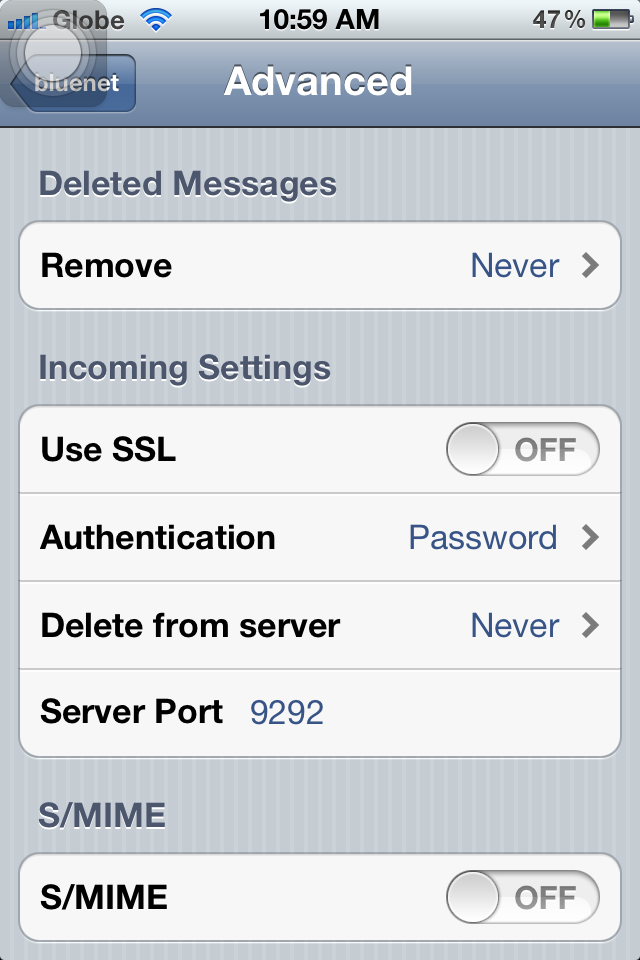
7c. SSL should be turned OFF under Incoming Settings, leave Authentication to Password. Server port should be set to “9292”.
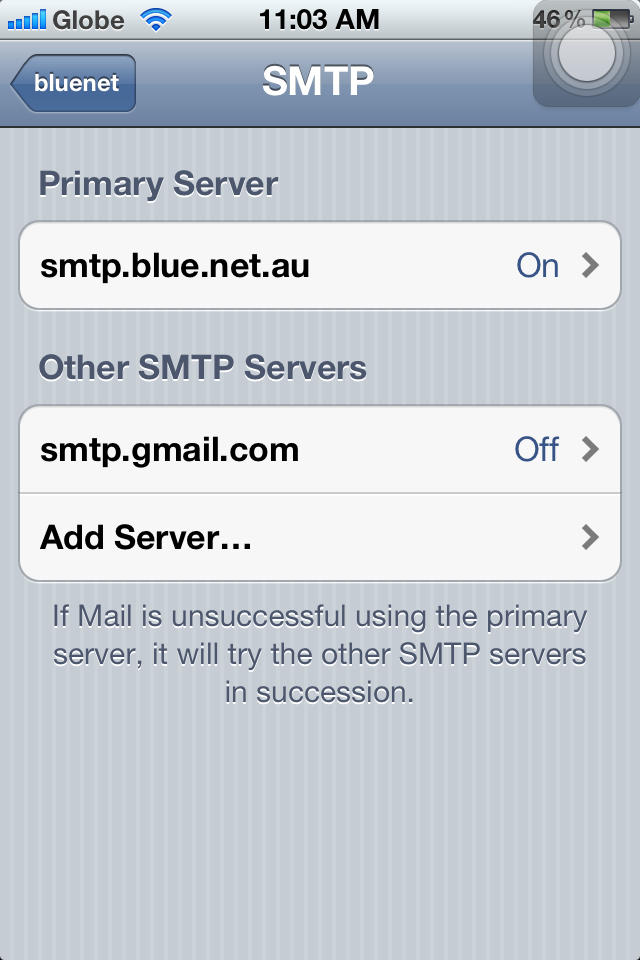
8. Tap SMTP to change its settings.
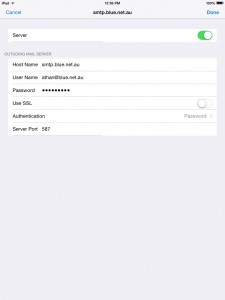
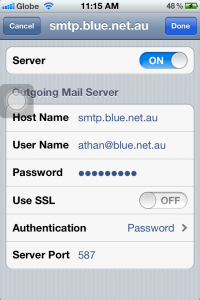
8a. Tap “smtp.blue.net.au” to change its settings.

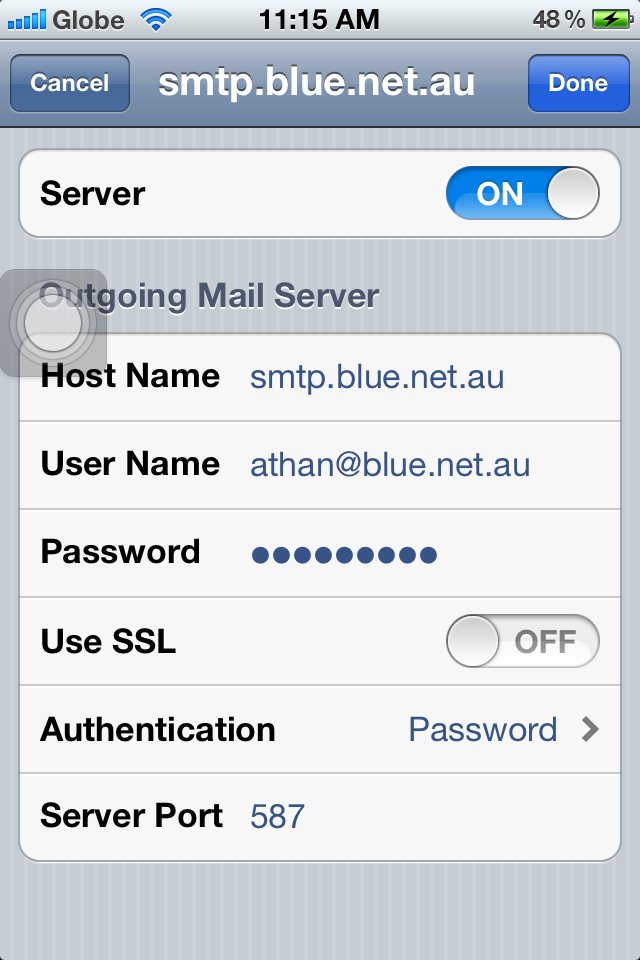
8b. Server should be ON. Check the host name (should be smtp.blue.net.au), and your username and password as well. SSL should also be OFF, Authentication to Password, and Server Port should be 587. Click Done.
You can exit Settings and open your Mail to start downloading the messages.
Posted in Settings | Comments Off on Setting up a Blue Net Pop account in iPhone
May 16th, 2012 admin
Export
mysqldump -u username -p database_name > dbname.sql
Import
mysql -p -u username database_name < dbname.sql
Replace username with the database username
Replace database_name with the name of the database
Condition of the above working is, that you are logged into the Linux server (by ssh or console) that runs the MySQL database and that you have the password relevant to the database user.
Posted in Linux | Comments Off on MySQL command line import/export
January 17th, 2012 admin
Are you trying to decide between fiber optic and copper cabling for your computer networking application? If the not-so-mere fact that fiber optics have completely revolutionized communications over the past couple of decades isn’t enough for you, CableOrganizer.com would like to share a few more reasons why you should definitely consider fiber optic cable:
- Fiber optic is so much more efficient…and secure. Compared to copper cabling, fiber optic cables can transmit far more information, with a greater degree of fidelity. Fiber optic cabling also offers extra security for the data being transmitted, since it is much harder to tap than copper cable.
- Only fiber optics can go the distance. Not only is fiber optic cable capable of carrying far more data than copper, it also has the ability to carry that information for much longer distances.
- Fiber optics can’t be interfered with! Because fiber optic cables are glass-based, they don’t conduct electricity. This eliminates the need for grounding, and makes them immune to any type of electrical interference, even lightning. Since fiber optic cabling is so resistant to interference and atmospheric conditions, it can be used outdoors — and in close proximity to electrical cables –without concern.
- Fiber optic cables don’t mind roughing it. Glass fibers don’t only escape interference…they are virtually free from the threat of corrosion, too! While copper cabling is sensitive to water and chemicals, fiber optic cabling runs almost no risk of being damaged by harsher elements. As a result, fiber optic cable can easily endure “living conditions” that coaxial cable just can’t, such as being put in direct contact with soil, or in close proximity to chemicals.
- You may be surprised by fiber optics, but you won’t be shocked. A major benefit of fiber optic cable is that it doesn’t pose a threat of physical injury to the user if it breaks. Since fiber optic cabling transmits light and not electricity, the people handling it run no risk of injury from fire, sparking or electrocution.
Let fiber optics take your telecommunications or datacom network to a whole new level.
Posted in Hardware | Comments Off on The Top 5 Reasons to Use Fiber Optic Cables
January 10th, 2012 admin
Sending an auto reply while on vacation
PATH=/bin:/usr/bin:/software/common/bin
MAILDIR=$HOME/mailroom #you’d better make sure it exists
LOGFILE=$MAILDIR/procmail.log #recommended
# Vacation work-alike (3/6/98) Accurso
#
# This is an annotated and slightly modified version of the
# vacation work-alike example given in “man procmailex”.
# The use of ^TO is the significant modification.
# See also “man procmailrc”.
#
# First we must decide whether to send an auto reply.
# All the egrep conditions (* lines) must be satisfied.
# If so, headers (h) of the current message are fed to
# formail which checks the vacation.cache to find out
# if the sender has already received an auto reply.
# We will lock vacation.lock while processing this
# recipe to avoid clashes when updating the cache.
#
# This recipe waits (W) for a return from formail.
# Without the (c) procmail would stop processing
# after completing this recipe because it is
# a delivery recipe, it delivers headers to formail.
#
# The conditions ^TO and ^FROM_DAEMON are more than
# meet the eye.
#
# ^TOzz1demo is satisfied if zz1demo
# appears in any recipient header To: Cc: Bc:.
# This avoids sending auto replies to messages that
# were addressed to an alias or maillist, but not
# explicitly to zz1demo.
#
# !^FROM_DAEMON makes sure we do not auto reply to
# messages from any of a wide variety of daemons.
#
# “!^X-Loop: zz1demo@ieng9.ucsd.edu” avoids replying
# to our own auto reply, notice below that this X-Loop
# header is inserted into the auto replies we send out.
SHELL=/bin/sh # for other shells, this might need adjustment
:0 Whc: vacation.lock
* ^TOzz1demo
* !^FROM_DAEMON
* !^X-Loop: zz1demo@ieng9.ucsd.edu
| formail -rD 8192 vacation.cache
# Due to (e) recipe below is executed if the preceding one
# returns an error status. In this case it is not really
# and error, it is just the signal from formail to go
# ahead with the auto reply. Notice that if in the
# preceding recipe the egrep conditions are not met
# and that causes the formail cache check to be
# skipped, procmail is [somehow] clever enough to skip
# this recipe.
#
# The headers (h) of the current message are fed to the
# formail in this recipe in order to construct the
# headers for the auto reply.
#
# The (c) in this recipe causes the whole
# current message to be processed after this recipe.
# Typically that means it will be processed with no
# further recipies and that is how you get a copy in your
# mailbox. There is no need for a lock while executing
# this recipe so none is used.
:0 ehc # if the name was not in the cache
| (formail -rA”Precedence: junk” \
-A”X-Loop: zz1demo@ieng9.ucsd.edu” ; \
echo “I received your mail, but I will be away”; \
echo “from the office until Monday Dec 15th.”; \
echo ” “;\
echo “If this is an urgent matter, please call my office XXX-XXXX “;\
echo ” “;\
cat $HOME/.sig \
) | $SENDMAIL -oi -t
Automatically discarding or returning unwanted mail
Return to sender with “reject” notice (not for spam!)
# This procmailrc will automatically reject and bounce mail from
# certain addresses. NOTE: DO NOT USE THIS FOR SPAM! Only use it for
# folks that you know have a valid return address.
#
# This file can be dropped into your home directory as ‘.procmailrc’, or
# inserted into your existing ‘.procmailrc’, with or without the
# comments.
# -zz1sn 2/18/98
#
# The :0 is the start of a rule. Note, blank lines in a rule are NOT
# happy. Don’t insert any blank lines between the :0 and the line with
# $SENDMAIL, or the rule won’t work. Also, don’t put any comments
# within the rule, either.
#
# The *^From:.*example.*nuisance
# line indicates the string you want to match. If the From
# header in the e-mails you want to match looks something like
# From: Block Head <llarry@ancientgames.com>
# you can use a rule like: *^From:.*llarry.*ancientgames
# or perhaps something like *^From:.*Block Head
# (Remember, case is important – capitals are different from lowercase!)
#
# You want to be as specific as possible, but general enough to
# catch the person’s e-mails. The ‘*^From: bit ensures that the
# rule only matches on the ‘From:’ header, and the ‘.*’ sequence
# is a wildcard (match 0 or more occurrences of any character).
#
# Replace ‘example.*nuisance’ with your expression; otherwise, this
# rule won’t do a thing.
#
# If you want to reject mail from more than one source you can
# repeat the whole rule (from the :0 line to the SENDMAIL line)
# as many times as necessary in your .procmailrc file. Put
# a blank line between rules.
#
# This rule bounces the mail. First, it pipes through a series of
# commands that generate a new e-mail. ‘formail’ takes the old e-mail
# and generates a response; we replace the ‘From:’ line with
# ‘devnull@ucsd.edu’ (which silently discards all mail) to prevent
# mail loops caused by ricocheting bounces.
#
# We then pipe the result through $SENDMAIL -oi -t, which tells
# sendmail to ignore dots as end-of-file markers, and to grab the
# sender/recipient info from the message body.
#
# Note syntax; anything that should be in the message needs to go in
# an ‘echo’ statement inside the parentheses. It should be
# double-quoted, and should not contain funny characters (*, $, etc.).
# The ‘ \’ (space-backslash) needs to be at the end of each line
# except the last to indicate that technically the entire rule belongs
# on one line.
#
:0
*^From:.*example.*nuisance
|( formail -rI”From: Responses will be automatically discarded <devnull@ucsd.edu>”; \
echo “Your mail has been administratively rejected.”; \
echo “It was NOT received.” \
) | $SENDMAIL -oi -t
Discard/block e-mail messages (without return to sender)
# This procmailrc will automatically reject and discard mail from
# certain addresses.
#
# This file can be dropped into your home directory as ‘.procmailrc’, or
# inserted into your existing ‘.procmailrc’, with or without the
# comments.
# -zz1sn 3/09/98
#
# The :0 is the start of a rule. Note, blank lines in a rule are NOT
# happy. Don’t insert any blank lines between the :0 and the line with
# $SENDMAIL, or the rule won’t work. Also, don’t put any comments
# within the rule, either.
#
# The *^From:.*example.*nuisance
# line indicates the string you want to match. If the From
# header in the e-mails you want to match looks something like
# From: Block Head <llarry@ancientgames.com>
# you can use a rule like: *^From:.*llarry.*ancientgames
# or perhaps something like *^From:.*Block Head
# (Remember, case is important – capitals are different from lowercase!)
#
# You want to be as specific as possible, but general enough to
# catch the person’s e-mails. The ‘*^From: bit ensures that the
# rule only matches on the ‘From:’ header, and the ‘.*’ sequence
# is a wildcard (match 0 or more occurrences of any character).
#
# Replace ‘example.*nuisance’ with your expression; otherwise, this
# rule won’t do a thing.
#
# This rule silently discards all mail containing the matched From:
# address. If you want to discard mail from more than one address,
# duplicate the entire 3-line rule, from :0 to /dev/null (changing the
# wildcard expression appropriately)
#
#
:0
*^From:.*example.*nuisance
/dev/null
Posted in Linux | Comments Off on ProcmailRC recipes
November 18th, 2011 admin
By far the simplest way to transfer/copy/move instanaces between AWS regions is to use the Ylastic interface.
It is US$20 and when you transfer there are costs for traffic and a temporary control instance (which you also will have with the method below). However Ylastic makes this a 5 minute understand and setup process. And it works even for Windows instances.
Preparation:
In AWS web console
- Stop instance to move to another region
- Make snapshop (you can restart your original instance and put it back in production)
- Make new volume of snapshot
- Start another instance
- Attach the volume from the snapshot to the newly started instance
- (on the temp instance in the source region) Mount the volume to the instance
- Start an instance in the target region
- Create a volume of the same size as your source volume in the target region in the same availability zone as your target instance.
- Attach the just create volume to the target instance
- (on the target instance) Format the attached volume with the same file system as the source instance.
- (on the target instance) Mount the target instance
- (on the target instance) make sure you can access the temp instance in the source region via SSH – disable any keys and change ssh_config in the temp instance in the source region etc, if you have to.
- (on the target instance) Copy files from the temp instance the source to the mounted volume on the target with rsync:
rsync -PHAXaz -e ssh ec2-107-22-76-156.compute-1.amazonaws.com:/mnt/sdf1/ /mnt/sdf1
- (on the target instance) Unmount the volume
- Detach the volume
- make a snapshot
- make an image
- start the instance. DOESNOT WORK. Don’t know why.
Posted in Linux | Comments Off on Amazon AWS EC2 – Move instance to other region
November 9th, 2011 admin
I have a running instance (virutal server) with an additional attached volume (virtual hard disk) on Amazon AWS and I need to make a snapshot (back it up) regularly. So I can restore it quickly if need be.
For this purpose the following steps are taken:
- Setup another machine either inside or outside of AWS with the EC tools (http://aws.amazon.com/developertools/351). I chose one of the preconfigured Amazon images with EC2 tools already installed and spun up a micro instance in the same region as my servers, that then controls all the backing up of all my instances. It does not matter in which region the backup server controller is spun up, but it will only make snapshots in the region the backed up volume or instance resides.
- It is vital to have a valid X509 certificate with the private key. Create it in the Security Essentials section of AWS.
- Next you will need to know the volume IDs you want to back up. They are found in the Amazon AWS Management Console under EC2 / Elastic Block Store / Volumes
- The command to use to create a snapshot is:
ec2-create-snapshot -C cert-YOURCERT.pem -K pk-YOURPK.pem VOLUME-ID -d “An optional description (I also use the $(date +%C%g%m%d%H%M%S%N) to timestamp my snapshot”This will make the snapshot appear in the Amazon AWS Management Console under EC2 / Elastic Block Store / SnapshotsYou could automate this with cron.
- From within the Amazon AWS Management Console under EC2 / Elastic Block Store / Snapshots you can create an Image from your snapshot (which then appears in EC2 / Images /AMIs) or a create a volume (which then appears in EC2 / Elastic Block Store / Volumes)
- The resulting AMI can be spun up as a new instance or the volume can be attached to a running instance and appears as an additional disk.
Steps 1 to 4 describe Backup.
Steps 5 and 6 describe Restore.
Note: I have not tested this with running databases (MySQL or PostgreSQL). If in doubt shutdown databases first then create the snapshot. Then start the databases up again.
Posted in Hardware | Comments Off on Amazon AWS: Backing up running instances with additional volumes